Whether you’re working in a studio, school hall, home cinema, or creative space, ceiling-mounted curtain tracks are one of the most effective ways to hang large, functional curtains — especially for acoustic, blackout, or room-dividing purposes.
This guide will walk you through how to plan and install a professional-quality curtain track system for high ceilings.
🎯 Why Use Ceiling-Mounted Curtain Tracks?
Ceiling tracks offer:
✅ A clean, modern look with no wall obstruction
✅ Flexibility for full room width coverage
✅ Better sound and light control (curtains can sit closer to the ceiling)
✅ Ideal support for long-drop, heavy-duty curtains used in performance or recording spaces
They’re especially useful in:
🎭 Theatres and school stages
🏢 Open-plan offices and creative studios
🏠 Home cinemas or loft conversions
🎤 Podcast or music rooms needing surround coverage
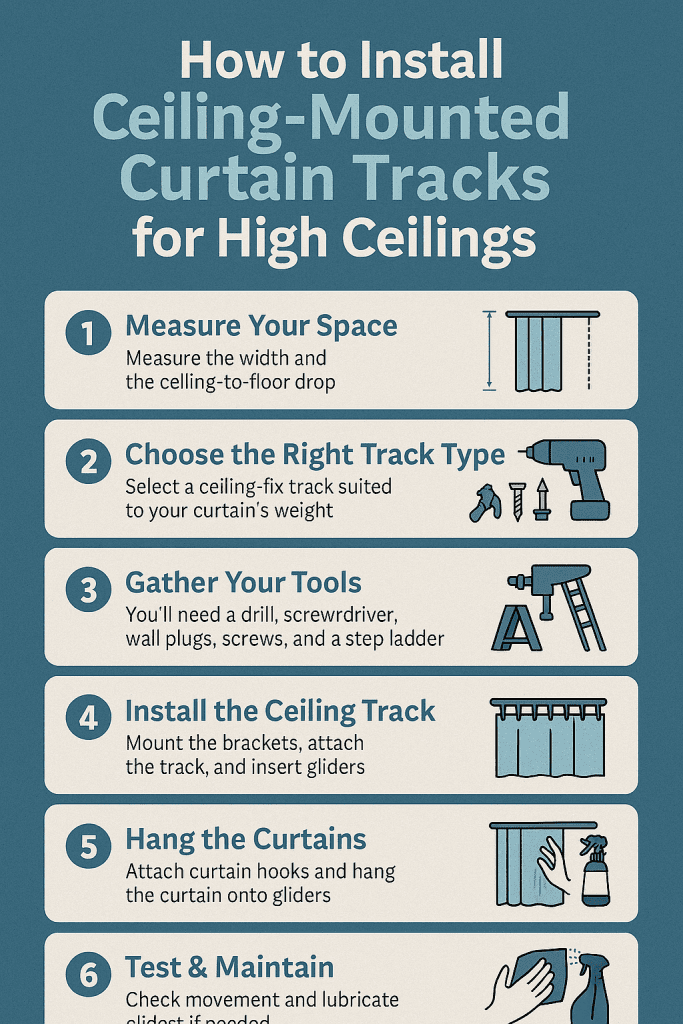
📐 Step 1: Measure Your Space
Accurate measuring is key for a smooth installation. You’ll need to:
Measure the full width where the track will go (wall-to-wall, corner-to-corner, or part of a room)
Measure from ceiling to floor to determine your curtain drop length
Check for obstructions like light fixtures, beams, or air vents
Decide how far the curtain will project out (e.g., to clear furniture or create a divider)
Pro tip: Add 10–15% extra width for curtain gather (so they don’t hang flat).
🔧 Step 2: Choose the Right Track Type
You’ll want a ceiling-fix track that suits your curtain’s weight and style.
Popular options include:
Standard aluminium tracks for light to medium curtains
Heavy-duty tracks for stage or acoustic curtains
Motorised tracks for remote or smart-home setups
Flexible bendable tracks for bay windows or curved layouts
Make sure your track includes:
Ceiling brackets (not wall fixings)
Gliders or rollers for smooth movement
End stops or overlap arms if needed
🧰 Step 3: Gather Your Tools
You’ll need:
Tape measure
Drill with masonry or wood bits (depending on ceiling type)
Screwdriver or electric driver
Step ladder or scaffolding (for very high ceilings)
Wall plugs and screws suited to ceiling material (e.g., plasterboard, concrete, wood)
Optional: A laser level for perfect alignment.
🛠️ Step 4: Install the Ceiling Track
- Mark the position along the ceiling where the track will run
- Use a spirit level or laser to ensure it’s straight
- Drill pilot holes and insert plugs (or appropriate anchors)
- Screw the ceiling brackets into place
- Click or slide the track into the brackets securely
- Insert gliders or runners into the track
- Add end stops or returns if required
🧵 Step 5: Hang the Curtains
Attach your curtain using the correct method for your heading style:
Hooked gliders for pencil or pinch pleat
Eyelet-compatible runners for grommet tops (special clips may be needed)
Velcro headers for stage or acoustic curtains
Double-check that:
The curtain glides smoothly
There’s no light gap at the top (especially for blackout)
The curtain hangs evenly at floor level
🧼 Step 6: Test & Maintain
Once installed:
Open and close the curtains fully to check movement
Tighten any loose fittings
Vacuum the track occasionally to remove dust
Lubricate gliders or runners if they stick (use silicone spray — not oil)
⚠️ Common Mistakes to Avoid
❌ Using wall brackets when ceiling fixings are required
❌ Forgetting to account for the curtain’s stack-back space
❌ Installing too close to other ceiling fixtures (like lights or projectors)
❌ Hanging too low — aim for 1–2 cm clearance from the floor for best results
📞 Want It Done Professionally?
At Studio Curtains, we design and install ceiling-mounted curtain track systems across the UK — for acoustic, blackout, and stage use in both residential and commercial spaces.
👉 Contact us or call [0800 772 0367] to request a quote or schedule an on-site consultation.